
- Pablo EA1FID Álvarez

- 16 Sep, 2023
Ponencia en Iberradio 2023
El pasado día 16 de septiembre tuvo lugar la mayor feria de radiocomunicacioens amateur en España: Iberradio. Como parte del programa, tuve la …
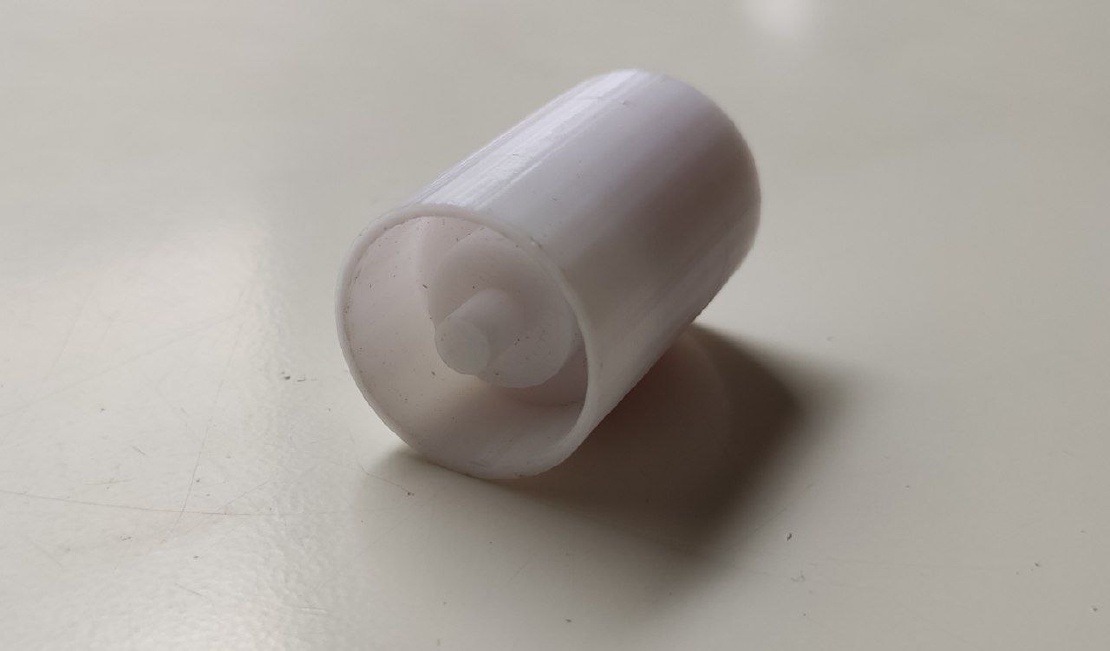
In this post, we would like to share our design of a dielectric lens for the 10,5GHz band. It has been optimised for its use with commercial satellite dishes of f/D of 0,4, achieving optimal efficiency with respect to reflector illumination (-12dB of illumination at its edges). It can be 3D printed in PLA.
The main characteristics of our dielectric lens are the following:
Cheap and easy to build: you only need a 3D printer and some PLA to make one!
Optimal illumination of the dish: this lens has been designed to offer around -12dB of illumination at the edges of the reflector, achieving this way an optimal performance
Compatible with 22mm waveguide: designed to be used with widely-availabe 22mm metal tubing, which has become a standard in amateur radio users of the QO-100 satellite
Great bandwidth: this lens includes a matching section to ensure a perfect resonance at 10,489GHz (central frequency of the QO-100 passband) and has wide enought bandwidth as for covering from 10GHz to 11GHz, allowing its use both in the entire 3cm amateur band and as a receiving satellite station for other GEO sats

| Specification | Value | Units |
|---|---|---|
| Gain | 11.86 | dBi |
| 3 dB Beamwidth (E plane) | 42.9 | º |
| 3 dB Beamwidth (H plane) | 48.4 | º |
| Efficiency | 91.0 | % |
| Lowest SWR | 1.00 | - |
| Bandwidth | 2.00 | GHz |
| 19 | % | |
| SLL (E plane) | -17.3 | dB |
| SLL (H plane) | -16.7 | dB |
Note: bandwidth is measured between points at 1.5 SWR (very conesrvative measure). XPD is referred to broadside direction
| Simulated radiation pattern | Simulated SWR |
|---|---|
 |  |

All of the measurements, plans, .stl files and more can be found in our GitHub repository
This is a very simple to build antenna. In order to make your own, you just have to:
Acquire a 22mm metal tube. This will be used as the waveguide connecting the antenna with the LNB. Copper is recommended (you may want to solder a patch antenna for the TX side in the future).
Print the dielectric lens. Important: use PLA with 100% infill. This ensures a good performance of the dielectric material, matching the simulations.
Introduce the waveguide in the dielectric lens to its end. It is as easy as that!
Enjoy!

Written By
Quantum Engineer by the Eidgenössische Technische Hochschule Zürich (ETH), Telecommunications Engineer by the Universidad Politécnica de Madrid (UPM) and Amateur Radio operator (callsign EA1FID) from a young age.

El pasado día 16 de septiembre tuvo lugar la mayor feria de radiocomunicacioens amateur en España: Iberradio. Como parte del programa, tuve la …
Today, we are glad to present you a very special antenna: Aiga. Aiga is a double band VHF/UHF antenna designed for portable use. In this way, it uses …